Pages

Wednesday, 25 December 2013

The 'Man Cave'

Well, the garage conversion is not completely finished. I've still got some alterations to do on the door, lay cork tiles and build a work bench at the door end of the room. But... on Christmas Eve enough carpet tiles were laid for me to start moving stuff into my new hobby room. (or 'Man Cave' as it has become known).

First in was Tredethy Wharf...

What a Christmas present...
When all the Christmas gatherings are over, I'll start transferring everything else into the room, which, after a little decoration, will free up my current hobby room for the start of the new arrival (foster child) in late January.

Happy festive season and best wishes for an enjoyable modelling 2014 to you all.

Wednesday, 11 December 2013

More thoughts for the big project

While the garage conversion has been progressing (electrical wiring has passed all tests, new insulated floor is now in place and I've started decorating) I’ve been thinking about the grand project. In the main, this is due to thoughts about where to position a bench; hobby desk; shelves etc. so that they will have the least impact on space when building the layout.

Even though Grogley Junction has been the aim of this blog, other thoughts of layouts keep cropping up. Boscarne Junction being one that I've seriously considered, especially since a fine collection of photographs of the Junction taken in the early 1960s has come into my possession, but my thoughts still keep coming back to a fictious Grogley. What seems to keep swinging it for me is the 'S' shape of the layout with the potential for different viewing angles compared to a layout built on straight basboards. So after a few more sketches and further thoughts about alternative history another drawing has been produced.

Room plan
You could all ask, 'Why is there a double track running to the junction when, apart from the passing loops at stations, the whole of the North Cornwall Railway was single track? Well... in the alternative history I'm developing for this stretch of line I’m justifying the double track by using the following ideas:
  • I’m siting a station at Polbook, just the other side of the road overbridge (scenic break) on the left. This will become an exchange station for the passenger workings between the branches to Wadebridge and Bodmin and the NCR (Launceston to Mawgan Porth). At the side of the station I’m also proposing a small engine shed of a similar size to the one at Wadebridge.
  • On the real railway, the NCR joined the Bodmin & Wadebridge line at Wadebridge Junction, just under a mile from Wadebridge. In 1905 the junction was removed and the NCR was extended to run alongside the B&WR making two parallel single running lines. This brought the control of the junction to Wadebridge East box. I'm going to reflect this and have the lines running from Polbrook to Wadebridge Junction as two single lines running parallel with each other with the control of the Wadebridge junction at Polbrook (a distance of about 1.25 miles).
  • As Grogley Junction would require a signal box to control the exchange sidings and goods loop there would be no need to reduce the lines in this direction to single line workings until after the junction.
I accept these ideas are totally preposterous but they will enable me to make the whole section from Wadebridge Junction to Grogley Junction double track. From Wadebridge Junction to Polbrook it would be two parallel single lines then double track from Polbrook to Grogley Junction. Confused…? I hope the diagram below might help.


The advantage for the model having a double track is that it will enable me to halt a passenger train at Grogley using a sequence of operations such as...
1) a down Launceston to Mawgan Porth passenger train would leave Polbrook station and be held on the junction signal at Grogley while waiting for another train approaching from the opposite direction
2) in the mean time at Polbrook station a Padstow to Bodmin North passenger train could arrive at the down platform
3) then an up working from Mawgan Porth to either Padstow or Launceston could arrive in the up platform at Polbrook after passing the down working at Grogley Junction
4) the down Launceston to Mawgan Porth passenger train which has been halted at the junction signal would be given the clear road to Mawgan Porth
5) finally the down Padstow to Bodmin would then depart passing through Grogley Junction
Hope the above makes sense...For me I'm finding that what happens off scene helps to justify and/or dictate what happens on the layout which then helps with creating the track plan.

I'm trying to keep the feel of the line weaving it's way through this section of the valley. There will be a number of liberties taken to enable me to fit it into the space available but hope I'll be reasonably successful. In creating the S shape I’ve been trying to keep the minimum radius to no less than 40 inches as it is my intention to run a 42xx (2-8-0T) through the goods loop on the clay workings. This has forced me to amend the last track plan as the curve at the Polbook end was already at 40 inches, too tight to install a point on the inside of the curve. Outside curve at the Polbrook end is now about 72 inches. The inside curve at the Grogley Junction end is about 48 inches. All other curves on the main running lines, and through the points, are no less than 40 inches radius. The sidings can be a shade tighter as these will be shunted by nothing larger than 0-6-0Ts or Class 08 or 03 diesel shunters hopefully more often by a Beattie Well Tank..

The slow gestation period for this layout will continue... More work is needed on the timetable to make sure the track plan is adequate for all train movements. Questions need asking about signalling through this whole section of line from Wadebridge Junction to Grogley Junction again to check my track plan. More thought is needed on the fiddle yard arrangements, as I’m concerned my initial plan of using cassettes might not be practicable

On the scenic side I need to sort out the gradients and land contours on the plan as the original line was on a rising gradient through the valley (left to right). The contours on the plan have been lifted from an OS map and are still shown in metres above sea level. These will need converting to scale and adjusting to give the correct impression without leaving me with sidings on a slope. Eventually I'll be drawing the track plan in Templot to make sure it fits in the available space. Grogley track plan is much more complicated that Tredethy Wharf with the crossovers, single and double slips plus at least one 3 way so will no doubt test my skills with Templot. On top of all the above I don't yet have a clue how I'm going to construct the baseboards so a quarter scale model might be needed.

What of Tredethy Wharf? Well… before any timber is cut for Grogley Junction, Tredethy Wharf will be completed...

Monday, 18 November 2013

The Garage (progress report)

I think I'd better come clean....Due to the impending Fostering panel meeting and the thought we may be approved, we drafted in help with this conversion. This has given the project a tremendous kick and we are now well on the way to finishing the room.

Since the last update...

Over a previous weekend we fixed plasterboard to one wall and ceiling leaving me to complete the insulation during weekday evenings.

Garage door end

Rear wall
During the following weekend, while we were away in Edinburgh for a belated break, helping hands plasterboarded the remaining walls and two end walls where skimmed leaving me to complete the roof hatches. During this last weekend the ceiling and two side walls have been skimmed.

Garage door end
A little 'snot' on the floor to clear up when dry
You could say job almost done, but we've been having thoughts about the floor...

Initially I was planning to using gym floor matting, as a covering for the concrete floor, but I've ended up with a couple of sheets of one inch Celotex insulation left over. Rather than discard them we've been thinking how to use them and the floor became a likely spot. Not to add an extra layer of insulation at floor level while the garage is empty would seem to me to be an opportunity missed. So next weekend, the plan is to, screw battens to the floor at 400mm centres with the insulation laid between them, finishing off with 18mm tongue and grooved chipboard floor boarding. Shame I'd not thought of this sooner as I could have laid cable for underfloor heating!

When the floor is in place the electrics can be finished; skirting board installed; architrave added around window, door frame and loft hatches;  the room will then be painted, and a workbench built. Once extra security is installed in the door and possibly some cheap carpet laid, I'll be able to move in and get back to working on Tredethy Wharf.

Friday, 1 November 2013

The Garage (Modelling Room) update

Thought I'd bore you all with what I've been up to in the garage during the last couple of weeks. Rather than trying to verbalise progress, a picture story board might be more interesting...


Stud panelling complete along one side wall


Starting on the other side wall


Tanking slurry finally finished on pillars and around window and door reveals


Late finish last Saturday evening. It's not a garage any more! (Though the side door and window stud wall panels need finishing). Extra noggins have been installed in the end wall to help with the fitting of a work bench.


After a tidy-up the following day, I moved the strip lights onto the end walls ready for fixing plasterboard to the ceiling. (Garage door end)


The garage has not been this empty since I moved in. (Rear wall end)


Wickes had their 100mm Celotex on offer so, a little earlier than planed, I have all the insulation for the walls in the garage. I can work around the inconvenience of the early purchase if it potentially saves me £150.00.


Two side wall stud panels insulated. Installing wall insulation has been brought forward in the project. I thought this was the best place for the Celotex rather that tripping over it while working on the ceiling.

Well that's the current state of play.

Due to the Wickes offer I've got a little ahead of myself as not all stud walls are complete. So the plan for this weekend is to: finish the window stud panel; fix the side door and window stud panels into position, and install the plasterboard ceiling. I'll then continue with insulating the walls during weekday evenings.

If I manage to finish the ceiling by Sunday evening it should start to feel more like a room rather than a garage...

Friday, 18 October 2013

The Garage (The Modelling Room)

As mentioned in a previous post I've been trying to spend time working on converting my garage into a comfortable modelling room. When I discussed my proposal with a builder friend he suggested that I consider using foam (SilverSill Foam) to glue the insulation to the walls and the same foam to glue plasterboard to the insulation. This seemed a very foreign method and, while I was installing extra roofing joists and wiring for new light and ring main, questions that kept running though my head were:
  1. What if, in the future, I wanting to hang shelves on the walls? 
  2. How strong would the bond be to the wall? 
  3. Would damp coming through the walls affect the adhesion of the foam?
  4. I was thinking of using 100mm thick insulation for the walls but, because of pillars in the garage, would like to have an air gap between the insulation and wall of about 40mm. Would using foam as glue have a negative affect on this air gap?
All these questions kept haunting me. Irrespective of the follow up conversations and a practical demonstration (in which the foam did glue plasterboard to a mucky piece of timber like 'shit to a blanket') I was never convinced that it was the correct method for me to use. In consulting a different builder friend, while he did not dismiss the method as being outlandish nor incorrect, he thought that a traditional method for lining the walls would be more suitable. So a 100mm x 47mm timber stud frame was discussed as the way forward. Now I can get my head around that...

Part of the garage is beneath ground level. Even though the garage does seem very dry, I've applied Tanking Slurry to these walls to stop water penetration.

Tanking Slurry applied

As I didn't know what I was buying nor how it needed to be applied I only purchased a 20kg bag, which covered about half the the wall area I needed to treat. The best way to describe the solution is as a cement slurry, mixed so that a 4" brush will stand upright in the bucket and applied as thick as possible to the walls. Easy peasy...another bag has been ordered...

First timber frame

While waiting for the extra bag of Tanking Slurry to arrive, I knocked together the first frame. This will have a damp course membrane between the floor and timber floor plate, as well as a vapour barrier stapled to the back between the outside wall and the frame. Installing 100mm Celotex insulation within the frame, should make it a warm, dry room...

Sunday, 13 October 2013

Buckets

A while ago I'd read a post on the Albion Yard blog about buckets so went ahead and purchased some etches thinking they would come in very useful. For some reason this evening, after a good day working in the garage, I thought I needed a little challenge and set about soldering one of the buckets together. Jumping in at the deep end I ignored the straight sided bucket and went for the, potentially more difficult, slope-sided example.

Surprisingly it was not too difficult. The handle was the hardest part but after summoning a bucket full of 'patience' I eventually had something that would 'hold water'!


For my first attempt at soldering something so small I'm well pleased... I've just started painting the 1/76 scale chap in the picture but thought including him might help with getting the comparative scale of the 1/72 bucket. The etch is in the background.

For more information go to Brengun where, on page four of their 1/72 accessories section, you should find the buckets along with a good looking tool set. On page three, of this section of their e-shop, there is also a very nice looking bike etch.

I have no connection with Brengun apart from being a very satisfied customer.

Friday, 4 October 2013

Scaleforum 2013

Not another posting on a model railway show, it's about time this chap got some modelling done, I hear you say.... BUT what a great weekend last weekend was.
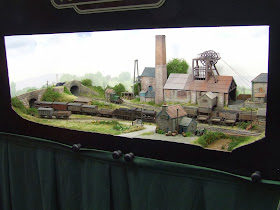
A new venue for this show and having never ventured down to Railex this was my first visit to the Aylesbury sports hall. Luckily I travelled with someone who had, so finding the venue and car parking was no issue. A new venue does bring with it a level of trepidation, a break with familiarity, which was all unfounded. No doubt there were some niggles that will always occur when putting on a show at a new venue but none affected my enjoyment of the weekend.

With all traders and exhibits in one hall, plenty of space to mingle it made the two days far less tiring than when it was at Leatherhead. With a good mix of layouts and demonstrations (again with plenty of room around the demos, unlike Leatherhead) with members willing to give advice on many aspects of the hobby I probably found this to be the best of the five Scaleforums that I've been able to attend.

Stage left

Stage right
There were eleven fine layouts on show, all inspirational with much to take in. Blackgill, Halifax King Cross and Alt-y-Graban Road were the three that gained my main attention.

Blackgill
Blackgill
Blackgill
Halifax King Cross
Halifax King Cross
Halifax King Cross
Allt-y-Graban Road
Allt-y-Graban Road
A few photos of some of the other exhibits..

Dubbieside

Nottingham Goods

Simington

Simington

Stoke-by-Nayland

The guest layout was Obbekaer, an essay in P87 of a fictitious location in Denmark. I found this to be a very attractive layout.

Obbekaer

Obbekaer

Obbekaer

Did I spend any money? Well I didn't purchase all that was on my shopping list. As I walked around the show I kept thinking I must start some serious modelling, finish some kits and crack on with Tredethy Wharf. I have plenty of projects in stock without adding to them. So enough was purchased to keep me going through the winter. Roll on Scalefour North...Oh along with Gordon Gravett's new publication on grassland and landscape modelling.

Above all what I enjoy about all Scalefour Society shows is the exhibitors willingness to chat and discuss elements of their models, as well as inspire and encourage. This gives every show a friendly atmosphere which I feel the Society achieved more than ever this year. So may I take this opportunity to thank all those involved, with organizing, demonstrating, exhibiting and trading.

Would I go again?..Definitely, in fact my room is already booked for next year...

Tuesday, 1 October 2013

Model Rail Live 2013

Just playing catch up...rolling back time by about 10 days.

Winterschalf Bob suggested we went to this show but I was not sure what to expect. At first I was not overly bothered about going as it was the week before Scaleforum. Once I'd seen that Albion Yard, Diesels in the Duchy, and Chris Nevard's Polbrook Gurney Colliery were there and it was only down the road at Newark, I thought I might as well tag along. I've been following these three layouts via blogs and RMweb postings for some time but not seen any of them in the flesh.

Of the three layouts Polbrook Gurney Colliery was the first of the three to be seen. 'Beautiful' is all I can say. Didn't see much running but then it was well presented with an excellent tone of colour and, for such a small model, plenty to take in just standing and looking.


Polbrock Gurney Colliery

Polbrock Gurney Colliery

Polbrock Gurney Colliery

Polbrock Gurney Colliery

Polbrock Gurney Colliery

Second of the three to be seen was Diesels in the Duchy. I must admit that while I was impressed with the standard of the modelling I still came away a little disappointed. Was this because I've seen many excellent photos and comments on-line that had built up my expectation too high or was it just my bad luck that each time I when back to view the layout it just so happened that there were running problems? Must have caught them at the wrong moments which is a shame as this was one layout I was really looking forward to seeing and watching. With all that said it as a fine piece of modelling so I'll have to try and get to see it again sometime.


Diesels in the Duchy

Diesels in the Duchy

I had no preconceived ideas about Albion Yard and I was really impressed. I liked the concept of a very high layout with a part scenic hidden sidings giving an impression of more layout beyond. There was movement on the layout each time I ventured back to it with good conversations with the operator. Shame I'll not be able to see this layout again as it is being retired.

Albion Yard (looking towards the hidden sidings)

Albion Yard (hidden sidings)

Albion Yard

To name a couple of other layouts that I've seen before but really enjoyed seeing again were:


Dewsbury Midland

Dewsbury Midland

Dewsbury Midland

and


Harton Gill

Harton Gill

Harton Gill

In the small demonstration area I managed to have a good chat with David Wright who has help me a little with my negativity towards scratch building buildings. I was also able to watch over the shoulders of the many who were crowded around Gordon Gravett's demo of landscape modelling.

As this was the week before Scaleforum purchases were kept to a bare minimum, I only bought a few items for wagon loads from Langley Miniatures.

There were plenty of other good layouts on show, so overall it was an enjoyable day. Was it worth the £10.00 entrance fee for one day? Hmmm possibly only just...more importantly would I go next year... not sure... depends on what's there.