Sunday 2 December 2012

Creating the earth

After applying a mixture of Artex and sand over the Mod-Roc, then sploshing a thin coat of raw umber over the covering the layout looks a little like a badly iced cake.


I'm hoping that the rough surface will give some extra lift to the static grass helping to represent tufts and undulations that can be seen in fields.


After applying the first coating of grass, I'm not sure the result is what I'm after. I think I might have over-done the rough suface. I'll stick with the idea for now, apply a few different textures and colours of grass to bring the ground alive a little. If it's not what I'm after it can be changed...


Thursday 29 November 2012

Warley 2012

Last Sunday I made my first ever pilgrimage to the Warley show. The opportunity arose as a thank you from Bob after helping him during the past year at exhibitions with his Winterschalf layout.

Since coming back to the hobby I'd been thinking about making the journey to the NEC to see this show but had been warned that it had become too well attended. Warned that, trying to view layouts is something similar to a rugby scrum with crowds of two to three deep; traders being very busy with often a long wait to be served and/or difficulty in seeing what they have on offer. So with this in mind I went with a slightly negative outlook. I had a surprise in store....

Firstly... wow... I didn't fully realise how large this show was. Secondly, it was a well organised show with the different scales grouped together and most specialist traders in their own area. Thirdly, even though we didn't get into the show until just after 11:00am there was plenty of room. Granted there were one or two layouts during the day that had crowds of two deep but patience always produced a space somewhere. At no time did I feel I couldn't appreciate what was on show, though this might have been down to the layouts that I was most interested in seeing. As far as traders were concerned non, that I needed, were any busier than at any specialist show I've recently visited.

Though my modelling interest is P4 (I made a beeline for the 4mm finescale area with Bodmin General, Evenstow, Holderness Light Railway, Cornwallis, Allt-y-Graban Road, et al) I do like to view different scales to appreciate other modellers' work. It was one of these other exhibits that impressed me the most.

La Baraque
La Baraque
La Baraque
La Baraque
La Baraque
La Baraque
La Baraque is the work of Hans Louvet and depicts a metre gauge railway in the Auvergne province of France in 1908, all modelled in S scale. Hopefully the above photographs show the skilful modelling on this layout.

The only down side for me is that Warley is definitely too large an exhibition to appreciate all that's on show in one day. There was plenty that I did not get to see, I would have liked to have taken longer viewing layouts; browsing trade stands and finding time to sit down with a few of the demonstrators, but overall it was a splendid day. Would I go again...? Definitely...

Thanks Bob.

Thursday 22 November 2012

Let there be light

And the big G came and divided light from darkness and there was light.


The big G being a helping hand from Gordon who supplied the cabling and also checked all was OK voltage/current wise.

The model is being illuminated by six 12v 2.2 watt, wide angle, warm white LED lights spaced at 14". I think G thought it was good.... Next day (tomorrow evening) the apprentice will start creating the earth.

Sunday 18 November 2012

China Clay wagons GWR dia 013 (part 6)

Back to modelling posts.

Eventually the first eight of my china clay wagons are ready for the paint shop.

Eight, Ian Kirk, china clay wagons
I've built four with independent Morton brake gear and four with standard four shoe Morton brake gear. On one of the latter I've not installed tie bars between the W irons as I've seen photographic evidence of a rebuilt clay wagon without tie bars.

I might leave these wagons in the unfinished state for a while and start on another eight clay wagons. My reason... well I'm thinking it might be better to have sixteen wagons in the above state available for Tredethy's first outing in May next year. This would enable me to run two trains of eight, one set of eight empty and the other eight with tarpaulins. If I get chance to paint a few before May I will. Leaving the wagons in a part completed state might also make a conversation point, and at least they will be in a similar state to the layout... still under construction.

So which clay wagons to be next, Ratio, Parkside Dundas or more Ian Kirk... I'll keep you posted.

Saturday 17 November 2012

Hull Model Railway Show

A little later than I wanted with this post but it's been a busy week.....

Last weekend brought an opportunity for me to visit Hull Model Railway Society's exhibition. The last time I ventured across the Humber to visit this show was when it was being staged in the Hull Town Hall. I cannot remember which year it was but the main attraction for me then was a layout depicting Evercreech Junction. This year there were a number of layouts that I've not seen before that I've been keen to see for quite some time.

Halifax King Cross
Halifax King Cross
Not sure what I can say about Halifax King Cross apart from superb. Operationally very smooth and scenically it just fits the area being depicted. In my opinion best in show.

Canada Road
Canada Road


Canada Road is a simple layout and does make me question the size of my test plank. Operationally and scenically there is more interest crammed into 10'6" x 2' than in a quarter of my 14' x 1' 6" test plank. It also probably took less time to build. Hmm....

Stainmore Summit
Stainmore Summit
For me Stainmore Summit is a train spotting layout and one that I stopped to view on a number of occasions. A DC layout with double headed trains that worked well.

  
Farkham
Farkham
Farkham
Another layout that facinated me was Farkham a layout depicting a secondary line passing through an urban landscape in the 1980s/early 1990s. A double track running into a single line enabled trains to be brought into scene and halt while they waited for a service to pass in the opposite direction. The overall presentation with the weathered buildings and rolling stock gelled the whole scene together nicely. The way that it has been designed with buildings and trees breaking up the layout into little viewing pockets is very interesting.

A small selection of photos of other layouts that I spent some time viewing....

Foston Mills
Foston Mills
Barrowfleet
Buxton TMD

Peter Denny's Leighton Buzzard was also at the show and what can I say about this layout that has not already been written? I decided not to take any photos of this iconic layout, I just stood and admired it for what it is...a legend. I, along with many others, have long admired the Reverend's work through the many magazine articles that have been published on developments of his Buckingham branch. The first article I read was in the September 1969 issue of the Railway Modeller. At the time, being a very young spotty teenager, I did not fully realise what I was reading but it was an article that dramatically changed the way I designed and built layouts. Leighton Buzzard may be showing its age a little but I've seen many exhibition layouts that couldn't hold a candle to this 50 something year old model.

So a very good show indeed, excellent layouts with good demonstrations and well supported by the trade. Hope I'll be able to cross the Humber to visit the show again, all being well, next year .

Wednesday 31 October 2012

Leeds Model Railway Exhibition

We spent last weekend in Leeds visiting my mother in-law. Strangely enough (?) it was also the weekend of two shows. One being the Leeds Model Railway Society's Exhibition, the other being Fiasco at the Royal Armouries. Now I knew I couldn't really vanish for two days and as I'd previously visited the wargaming show at least a couple of times but not been to the Model Railway show, the Model Railway show had to be the priority.

Not knowing what to expect, I was impressed. The venue was excellent with plenty of free parking, plenty of space for layouts and traders along with good catering. Amongst the normal numerous trade stalls selling Bachman and Hornby products there were a few modelling accessory stalls. One which was new to me was Unit Models, http://www.unitmodels.com, who manufacture resin castings similar to Ten Commandments range.

There were many layouts on display covering most gauges. Kilbrandon, an Irish S gauge layout was a nice surprise, unfortunately non of my photos of this layout are worth posting. I'd borrowed the boss's SLR and was experimenting with settings, trying to avoid using the auto setting. I live and learn....

The O gauge Milford made an impression on me and one of the operators took time out to explain some of its finer points. This layout has been around for a number of years but it was the first time I'd seen it.

 Milford

 Milford

 Milford

Another layout that I kept gravitating to was Colyer Street. A small Modern Image OO gauge layout based in Tyneside that was well presented and operated with a couple of friendly guys in front at the controls.

 Colyer Street

Colyer Street

Along with the British outline models there was a good selection of continental and American layouts. Unfortunately, due to my photographic experiments, only one photo is worth posting of these layouts. This little diorama is part of an Sn3 Scale American Narrow Gauge layout based in Colorado called Dolores.


Dolores

Other layouts that I enjoyed viewing for the first time were Calderwood, a fictitious Lancashire and Yorkshire Railway layout based in the Calder Valley and Bannochbrae, a small layout based in the Highlands of Scotland, both OO gauge.

Did I come away without spending any money? Well Bill Hudson Books were there so it was a no brainer that I'd part with some money. Gordon Gravett's book on Modelling Trees - part 2 Conifers was sitting on the passenger seat as I left the car park along with some Slater's plastic sprue purchased from Squires stall.

For me it was a surprise event, after checking out the web site I went along only expecting to be there for a couple of hours, instead I ended up stay for four hours, having to leave before I was really ready. I'll have to look out for this show next year and plan a visit to my mother in-law on the same weekend...


Monday 29 October 2012

GWR Clay wagons dia 013 (Part 5)

I'm gradually getting there with my first eight clay wagons especially as I've found more evidence of single V hangers on GWR diagram 013 clay wagons.

On page 54 of 'Great Western Steam in Cornwall' by Bradford Barton there is a photograph of a Pannier Tank 7714 hauling a rake of GWR diagram 013 clay wagons from the Burngullow branch. The first has a double V hanger but the second has a single V hanger with no tie bar. The rest are difficult to make out for certain.

Then on page 91 in the same book there is a photo of  Pannier 7709 hauling two clay wagons nearing Fowey. The first wagon has a single V hanger and looks to be a diagram 013. I think the second wagon is a BR diagram 1/51 as it has square ended buffer beams and looks to have a single v hanger but I'm not certain.

In discovering these photographs I'm more confident that there were a number of these GWR wagons refurbished during the 1950s with independent brake gear removed and replaced with standard 4 shoe Morton brake gear. This has encourged me to build four with independent brake gear and four with standard 4 shoe brake gear, more as a mistake than planed, as I'd installed a couple of brake gear castings the wrong way round.


The wagon front left in the photograph above is the first one which was converted from my EM days and shows the door stop straps in the wrong place. On the others I've scraped off the original mouldings and replaced them with stripes of Evergreen .010 x .030" strip, added small slices of Evergreen .010 x 0.20" strip to represent the bolts. The buffer beams have also had the ends cut at an angle, possibly not that accurate but at least the buffer beams don't have square ends anymore. All eight wagons need door stops, tie bars and couplings adding, plus some lead and then they should then be ready for the paint shop.

Bearing in mind that most of these eight wagons where originally EM gauge wagons, that have been ripped apart and rebuilt, I feel they are coming on nicely. The next challenge will be to achieve the correct finish.

Thursday 25 October 2012

The two foot rule.

I would not count myself as a 'rivet counter' just someone who would like to build wagons to represent the real item as close as my modelling skills will allow. My foray into P4 modelling standards is because I felt if I didn't have a go I would always regret it.

I met up with some old modelling friends recently and in an ensuing conversion I mentioned the time it is taking me to build a few clay wagons along with the amount of wagons I intend to build. Questions were raised about my sanity before I was reminded of the old phrase about applying the 'two foot rule'. If the detail cannot be seen from a viewing distance of two foot then why spend time adding the detail. I then made the connection with painting 15mm wargaming figures. When I paint battalions of 12 to 24 figures which are going to be seen on the table on-mass I paint them to be seen as whole units. Paint the figures so they give a visual impact when seen together as part of each battalion on the table. I don't necessarily cut too many corners with the painting but possibly don't put too much effort in, picking out buttons on tunics, adding shading on facial features, or any other small detail. Whereas I do put effort painting the personalities/command figures, picking out buttons, adding extra shading and trying to pick out facial features.

With this in mind and as most of the clay wagons will be part of a rake (battalion) of 8 or more wagons, I will be turning a blind eye to some aspects of the Ian Kirk kits, and taking a few liberties in building them. This may go a little against the grain of modelling in P4 but I feel I have to cut myself some slack otherwise I'll struggle to get all the wagons I will need built in my lifetime. When seen on-mass I'm hoping they will create the right picture that can be appreciated from two foot away when viewed side on. They might not stand up to the scrutiny of a close-up camera shot but then they are not being built for a diorama containing just a few wagons.

Does that sound like a cop out for some poor modelling skills? Hmmm could be...

Sunday 21 October 2012

Lighting pelmet takes shape

I'd been hoping to get all major construction work on the baseboards finished before the cooler evenings set in but I seem to be gradually running out of time. That said the lighting pelmet is coming together quite nicely.

When I started building Tredethy Wharf I had no real intention of exhibiting the layout, it was only intended as a test track, however I have been persuaded. As it will be making its first outing in May next year, thought has been focused as to how it would be best to present it. Having constructed the scenic baseboards without ends to hide the off stage sidings I've added  these to the fiddle yard baseboards. This gave me the idea that if these were strong enough I could use these end pieces to support a lighting pelmet, rather then hang the pelmet off L shaped supports from the back of the layout.

The pelmet has been constructed in two halves to follow the curve of the baseboard front. They are both longer then each scenic board so that they can be bolted to the end supports on the fiddle yard baseboards.


At the moment it is only clamped to the fiddle yard ends with no joint/connection in the middle. I'm surprised that there is no sag in the centre which might mean I could use a couple of Toggle Catches to hold the two halves together at the join.

I not sure if my construction techniques are up to much but so far I'm pleased with the result.

Wednesday 10 October 2012

Scenic test

I've been mulling over how to represent the ground cover on Tredethy Wharf. One member of the local group has been recommending teddy bear fur, dyed and then cut to shape and length. While it can give good results I have been using static grass for for my war-gaming bases for many years and wondered how I might use this material in larger areas.

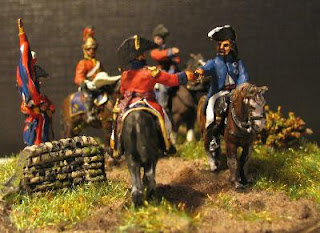
Above is a 15mm (1:100) British Napoleonic command stand that uses static grass. I use a substance called Basetex as ground cover on my wargaming bases, dribbled with some brown ballast to give added texture. A wash of Raw Umber is roughly applied and the brown ballast highlighted by dry brushing, after which the static grass is applied. This procedure was the starting point of my thoughts about how I could use these techniques on Tredethy Wharf.

In my opinion field grass is not uniform length nor is the ground flat on which it grows. Thoughts about applying a layer of 2mm static grass onto a flat surface would only achieve a uniform covering so this made me decide to construct a test block to do some trials.


A block was created using offcuts of Styrene which was then covered with Mod-Roc.  I then applied a thin layer of Basetex to one section but when dry it cracked and was easily chipped. Hmmm... Next thought was to use Artex plaster with a little PVA and some sand added for texture. I mixed three different batches of plaster, each with a different ratio of builders sand. These mixtures were then applied in three bands separated by a band of uncovered ModRoc and stippled to give a rough ground cover. A wash of Raw Umber was then applied and allowed to dry.


I applied 2mm and 4mm lengths of static grass along with a small section of flock on the uncoated ModRoc as a control to help me appreciate the difference between the types of ground cover. Then, in an attempt to represent tufts and different grasses, I applied different lengths of static grass (2mm, 4mm and 6mm) onto previous coverings.


The above photograph does not show the result very well but I think I'm starting to achieve the result I'm after. Although, I'll probably have a little more practice before starting on the layout.

Saturday 8 September 2012

A month on.

Well it's been a little more than a month since my last post and even though I've not been idle there does not seem to be much to show for my efforts.


During the last month I've built the base of the second fiddle yard baseboard; added the entry track and docking station for the storage cassettes on both fiddle yards; constructed a few storage cassettes; sculptured the styrene block to nearly all of the scenic area; covered all styrene on one board with Modroc; and thrown together a barn kit by Wills.


Not sure if the barn will end up permanently on the model as I don't think it is typically Cornish but as a temporary building it will help with a scenic break at that end of the model. I'll also make use of a Wills Farm Cottage kit for the cottage but I'll build it as a mirror image.

Quite a bit more time has been spent on further track testing, then doing a few minor tweaks here and there to improve running. Although while struggling with one particular annoying derailment, along with the fact that I'm struggling with my first chassis, I was nearly at the stage of deciding P4 is not for me. I could not work out why one wagon would come off and others stay on through a particular piece of track, then the next evening the problematic wagon would be OK. It was really trying my patience. Then a visit by local Scalefour group members and the encouragement they offered, plus a few more evenings of frustration, I think, I have finally solved the derailment problem.

A little more progress has been made with the clay wagons but not enough to show in this post. I've also started a test piece for trialling how to build up the ground work and apply grass, more of which later. So it would seem I've been busy though it does not feel like I have made much progress as I was hoping to have had the lighting pelmet constructed by now and to have started on the ground work on the model...

This project is certainly a huge learning process and is increasing my appreciation of all the skills that have gone into creating the excellent P4 layouts that are on the exhibition circuit. I will no doubt have many more trying/frustrating episodes... It would seem it's all part of the fun!

Sunday 22 July 2012

Tredethy Wharf progress

After a couple of weekends getting stuck into clearing some of the the crap out of the garage, then after some major tidying up, I have finally acquired enough space to erect all four boards of Tredethy Wharf.


Well, I've only just started constructing the final board this evening but once finished I'll be able to get some serious running sessions in to test the track and operation.

Sunday 15 July 2012

Clay Wagons GWR dia 013 (part 4)

Well it's been a while since my last posting, this was kindly pointed out to me at the last Scalefour Area Group meeting, but then I feel I've not much to report on the Railway front.

I've done some more running tests on the track and ironed out a couple more gremlins but also made a little more progress with the clay wagons. One evening, while browsing through some magazines, I came across issue 62 of British Railway Journal again. I suddenly realised that on page 196 there is a photo of a china clay wagon W92034 that has 4 shoe Morton brake gear. The caption beneath states '...Many of these ex-GWR vehicles were reconditioned in 1950 but replacement wagons, of similar design, were built by British Railways in 1955..." Seeing this one photograph does prove that some wagons had the 4 shoe independent brake gear replace possibly during the 1950 reconditioning program... So my first wagon was not so much of a mistake after all!

Above is the current state of my first clay wagon.

I'm starting to feel reasonably pleased with this first wagon though I have now noticed that the doorstops are too close together. I've positioned them in line with the doorstop straps/protectors moulded on the door of these Ian Kirk wagons...Doh.... does that mean I'll have to scrape them off and replace them? ... or is there an example/photograph/drawing with the protectors in this position? According to all the photographs I currently have in my collection,the new China Clay wagon produced by Parkside has these doorstop straps/protectors in the correct position, .

Last night, after contemplating what to do with the rest of my part rebuilt Ian Kirk clay wagons, I threw caution to the wind and scrapped off the doorstop straps on one wagon. Then out came John Hayes book on Coal Wagons to see if the maestro can help with ideas in how to replace them...I'll keep you posted if I succeed...

Tuesday 5 June 2012

Scenic start

Since the last post on Tredethy I've progressed the layout a little further. A recent visit by Gordon, when he brought along a couple of his locos and a few wagons, did show up a few little issues with running. One point's switch blades were still not closing with the stock rail in one direction. This was soon solved by replacing the spring wire that was supplied with the Tortoise motor with 0.9mmm spring wire from Gordon's own stock. Another point was being temperamental and though most wagons ran through it there were still the occasional derailment...The thought was that upgrading the spring wire might help on this point. The main issue that presented itself was a loose wire in the plug between the layout and the control panel, even though the last time I applied power to the layout it all worked fine. At the start of the evening this loose wire caused a short that was affecting point operation and the fault took a good hour to track down and solve. This has shown me the problems that can happen with a sectional layout that is constantly being moved and knocked. Since Gordon's visit I've purchase some 0.9mm wire and upgraded the two remaining points and they both now seem to work more consistently with, so far, no derailments


With the track fully commissioned I've tidied the wiring on both boards and retested the layout. Though this is a very simple layout with minimal wiring this was still a task that took a couple of evenings.


Then, after spending a couple of weeks on my wargaming projects, and a couple of days away at Stratford upon Avon trying to educate myself  with a bit of Shakespeare (probably too late in the day...), I've started to have another look at Tredethy. What is the next stage, ballasting the track, painting rails and chairs, or putting in the scenic sub base? I'm itching to get on with the scenic side of this test plank, so spent a few hours over this bank holiday building up the sub base on one of the baseboards with blocks of polystyrene .


There is still a bit to do on this first board before starting on the second. My intention is to sculpt the the polystyrene into the approximate desired contours before covering with a couple of layers of ModRoc. Once the ModRoc is applied I'll paint the rail and chairs then ballasting the track before making a start on the ground cover on the two boards. Not sure if this is the recommend order of things but it seems right to me.

Tuesday 22 May 2012

Clay Wagons GWR dia 013 (part 3)

On my first wagon nearing the completion of its rebuild, I've installed 4 shoe brake gear with connecting rod and the clutch handle towards the end door. This would seem to be how the vacuum brake gear was fitted to BR's diagram 1/051 wagons.


I'm just starting to realise that this might not have been the case with these older refitted non-vacuum braked GWR wagons. My understanding is that they were initially built with DCII non-vacuum brake gear with both the brake handles at the opposite end to the end door. After 1939, conversion to Morton brakes was initiated to conform to the 'right-handed' ministry rules (though possibly not to all as I've seen a photograph of one preserved at Brewdley with DCII brake gear). 

My problem is, was the DCII brake gear replaced with 2 shoe, 4 shoe, or 4 shoe independent Morton brake gear? If either of the first two which side was the clutch, handle towards the end door, or towards the fixed end? Looking again at the few references I have, and photographs I have since found on the web, it would seem that they had 4 shoe independent brake gear. Some photographs however are not clear and are confusing me slightly. So I'm wondering if there could have been a variation of brake gear fitted to these wagons.


I’m starting to think (partly as an excuse to my possible mistake) that, as St. Blazey wagon works repaired these older GWR wagons, there could well have been a variation in brake gear fitted. That said I would like to have the majority of these wagons fitted with the most common type of brake gear that they were equipped with. Though I will probably also include at least one with DCII just to 'tip my hat' to the heritage of these wagons.

I’ve posted requests for further information on a couple of forums. In the meantime, while I wait for confirmation/criticism of my thoughts, these wagons will be put to one side.

Saturday 19 May 2012

GWRJ No.82

Since April 6th I've had weekly visits to my local newsagents looking out for the next issue of the Great Western Railway Journal. At last I was greeted this afternoon by the sight of  issue No.82 on the shelf....


Passenger Operations at Paddington Station Part 7, (the last instalment in this series)
GWR Horse Traffic and Horseboxes
A Honeybourne visit
'Bulldogs' at work Part 2

Monday 14 May 2012

A cracking weekend

The title sums it up really. My birthday on Friday, followed by playing trains at the local Cleethorpes Model Railway show on Saturday, and then a good few hours on Sunday working on modelling projects.

One of the many modelling related presents I received was a very informative book covering a Summer Saturday working in 1961 on the North Cornwall Line, along with the Wadebridge to Bodmin services, including loco rosters and carriage diagrams. It will become another excellent reference as the Grogley Project unfolds.


Saturday saw me being tea boy and lunchtime operator on Gordon's model of Donington-on-Bain. This was its first public showing and very much a 'work in progress'. However being a local station it generated a great deal of interest about its history, as well as the model's construction.

Donnington-on-Bain

Along with Gordon's model two other P4 members, (Dave and Martin) were at the exhibition showing the initial stages of their next project. They are at the very early stages of building a model of Swan Yard at Great Yarmouth, and had on display location plans, photos, part of a Templot track plan, some stock and the beginnings of the baseboards. There are plans afoot for Swan Yard to make an appearance at next year's Cleethorpes show as a 'work in progress' showing the early stages of track laying, along with Gordon's Fish Dock Road and my Tredethy Wharf making its first public appearance. The organisers are kindly allowing our P4 area group to take over a complete room again next year...

During the exhibition it was also good to catch up with two friends that were members of the defunct Mablethorpe and District Model Railway Club, Steve and Bob. Bob was showings his Winterschlaf layout with Steve as support operator, a position I'll be filling at two exhibitions later this year. There was a good selection of other layouts at the show covering 009, N, HO American. HOm Swiss and OO gauge. Gamston Bank stole the show for me.

The thought that Tredethy Wharf has to be near completion in a year's time has spurred me on. During Sunday I think I managed to banish the two remaining track gremlins, no doubt more will surface as I use the model but for now it's working well. Once I've tidied up the wiring, I'll start to put some flesh on the bones. There are still the hidden sidings to design and build but I am looking forward to making a start on the scenery.

To top off this weekend, my son's band released their first single on iTunes with a supporting video on YouTube. I know it will not be everybody's taste but I do like what they are doing so please forgive me posting the following link...
Shades - A Note from Me (Official Video)
Please pass on this link to anyone you think might be interested. Oh...my lad is the good looking one hitting the skins... :-))

Tuesday 8 May 2012

Grogley Junction - Another idea

Since coming back from Cornwall I’ve been thinking about my Grogley Junction project. Spending time on the Camel Trail walking the line from Grogley Junction to Polbrock and beyond has really fired my imagination for the project.

In my collection of photographs of the line I have one of an O2 passing in front of some cottages with the river Camel in the foreground. To me it is one of those photographs that, along with photographs of Beattie Well tanks passing between the cottages at Hellandbridge, typifies the feel of this line. Until my visit to the location I could not place where the photo was taken as it is constantly referred to as being at Grogley. In fact the cottages are Grogley side of the road-over bridge at Polbrock. Finding the location and discovering from Andrew Jones survey that there was a continuous check rail though the reverse curves leading to the Polbrock road bridge, made me question whether I could include this section of line in my model of Grogley Junction. Unfortunately I would need something like 60 feet in length to model the whole section of line from Grogley to Polbrock in 4mm.


Considerations I’ve been trying to take into account over the last few weeks are: how far I want to bend history to suit my own ends; how much time the project might take; and the space I have available. As it seems to be taking me an eternity just to complete a little test track it would seem any grandiose plan of a large junction station with freight marshalling yard is way beyond my capabilities, not just in the space I have available, but also time I would have to get the model to an acceptable stage of completion in my life time.

Part of my time on the Camel Trail was spent photographing the bridges at Boscarne with thoughts that I might end up building a model of Boscarne Junction. Other thoughts have taken me to consider using the track layout at Boscarne Junction as a template for my Grogley Junction. This would mean that, in my alternative universe, Grogley Junction will be worked in a similar way to Boscarne Junction but with the addition of a few sidings. The extra sidings would be used for the marshalling of goods traffic for the different branches radiating from Grogley. If all goes well, the space I could have available to build this model is 23ft x (just under) 9ft. Taking off about 4ft each end for hidden sidings leaves me 15ft in length to try and do this fictitious junction justice.


Above is my initial attempt. The area that I've mapped out is drastically compressed in length and width compared to the actual location. I've also hacked a large section out between Grogley and Polbrock to bring the cottages, in the above photo, into the area to be modelled. I would be trying to replicate the scene in the photograph above looking from point A on the plan. After all the compression the hope is that the model can capture the feel of the valley and it would still be recognisable as Grogley/Polbrock. I'm also hoping I don't offend the locals too much with the butchering of their landscape...

The numbers on the plan are the metric heights above sea level. The track bed is about 10 metres above sea level. In 4mm scale the highest point at the back of the model would be about 20 inches above the track. At the front each side rise to approximately 7 inches. In the centre of the model the viewed is over the river and meadow to the track on a small embankment. The baseboard width is about 4.5 ft and, with the reverse curvature, will no doubt cause me some headaches to build.

So is this it...?  I doubt it, as the above is still a very rough and no doubt over the course of the next year I'll be reworking the plan many times while I'm trying to prove my modelling capabilities with Tredethy Wharf. The applying of information learnt from Andrew's survey in 1972, rail lengths, type of chairs and sleepers per length, into the track plan will also need to be undertaken. I also realise I have a lot to learn about the goods workings in the area and how my fictitious spin on the line would affect these workings and the need for the extra sidings.

Grogley Junction might still be a 'pipe dream', however, I do like the feel of the above plan and in my head it is creating some great images. I've now just got to stop dreaming/planning and get on with Tredethy Wharf...