Wednesday 17 August 2016

RailWells 2016

We arrived home last night after a few days down in Wells. This was our first visit to Wells and also my first vist to Railwells. Late on Saturday we arrived at our hotel, The Old Gatehouse, and after booking in we walked out of the back door of the hotel onto Cathedral Green to find the view below.

Wells Cathedral
What more could you ask for?... After a long drive, with drinks in hand, sitting with my lovely wife, admiring the changing colours on the west face of the cathedral during sunset... perfect...

Next day (Sunday) my wife was more that happy to have a wander around the city while I ventured into the Town Hall for RailWells.

There was a definite Somerset & Dorset Joint Railway theme going on due to its closure 50 years ago. Layouts that took my attention were...

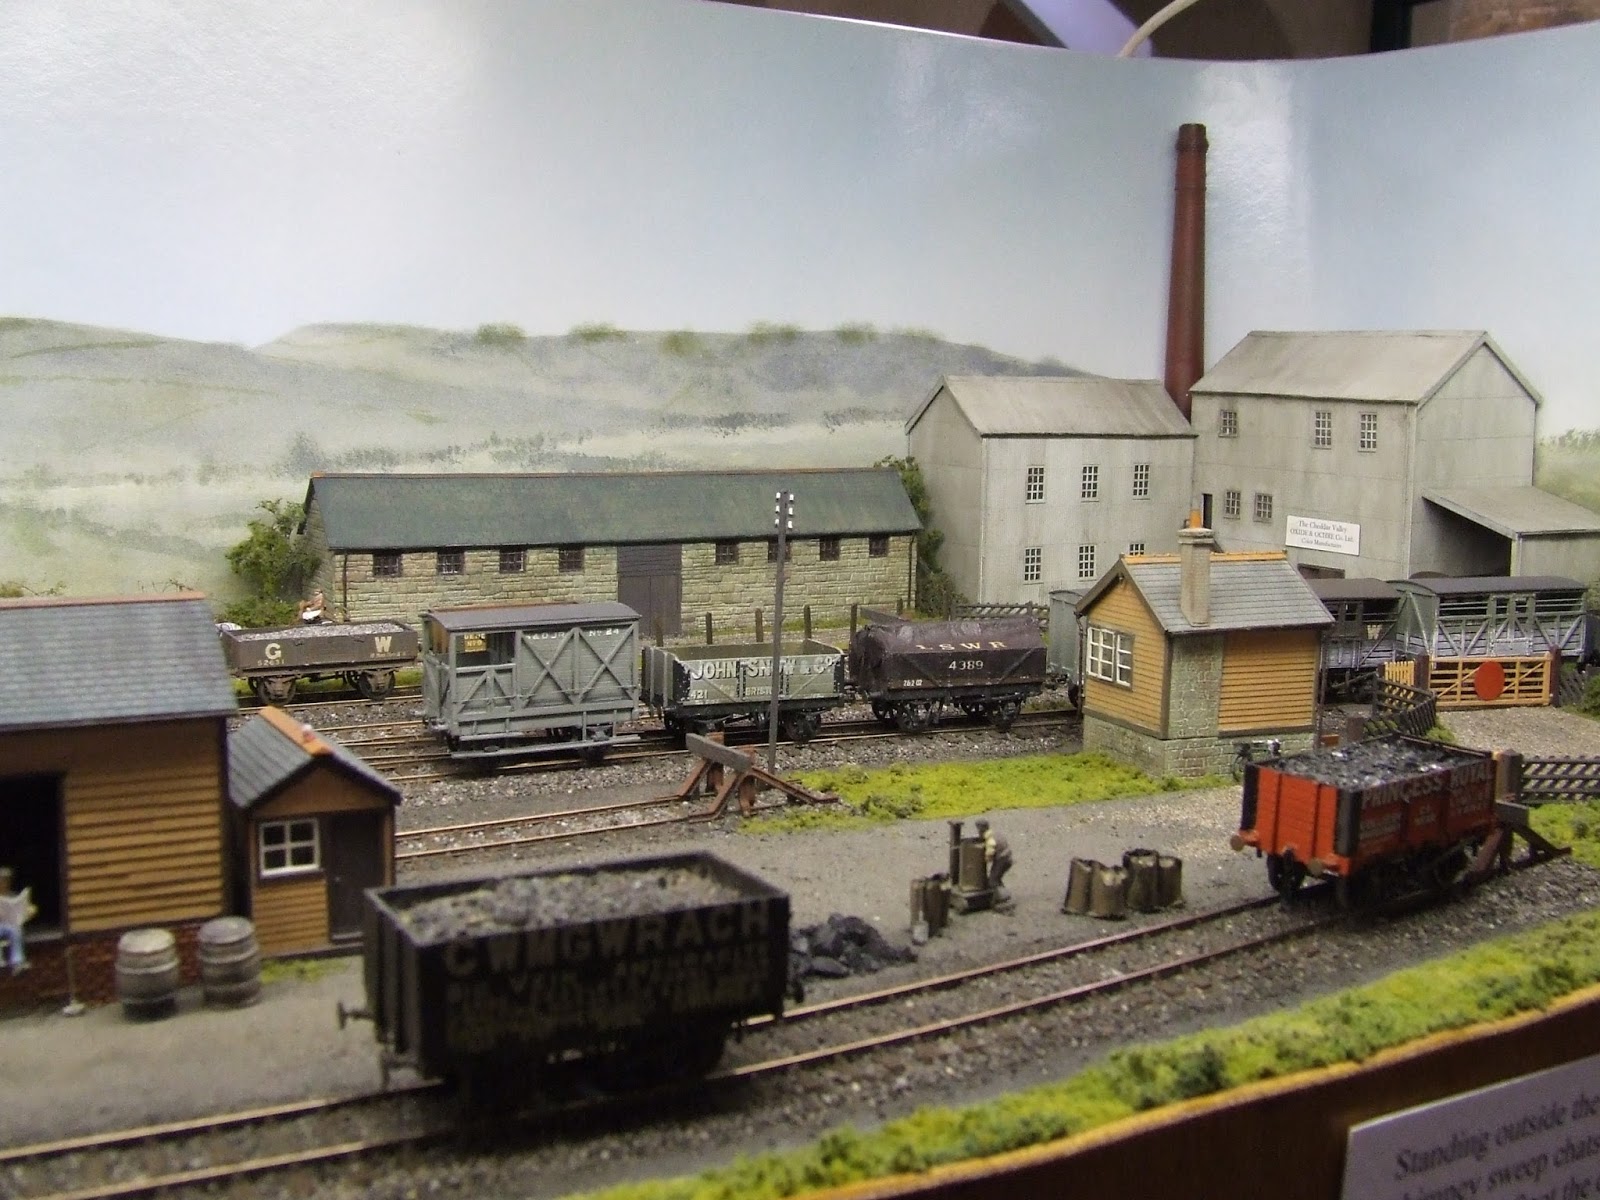
Cheddar S.& D.J.R. (P4)
Along with the whole look and feel of the Cheddar I liked the little stories applied by Simon Challis to the cameos of figures on the layout. Above shows one of several little cameos with a discription on the facia of the layout, others include a nurse and baker on their rounds...

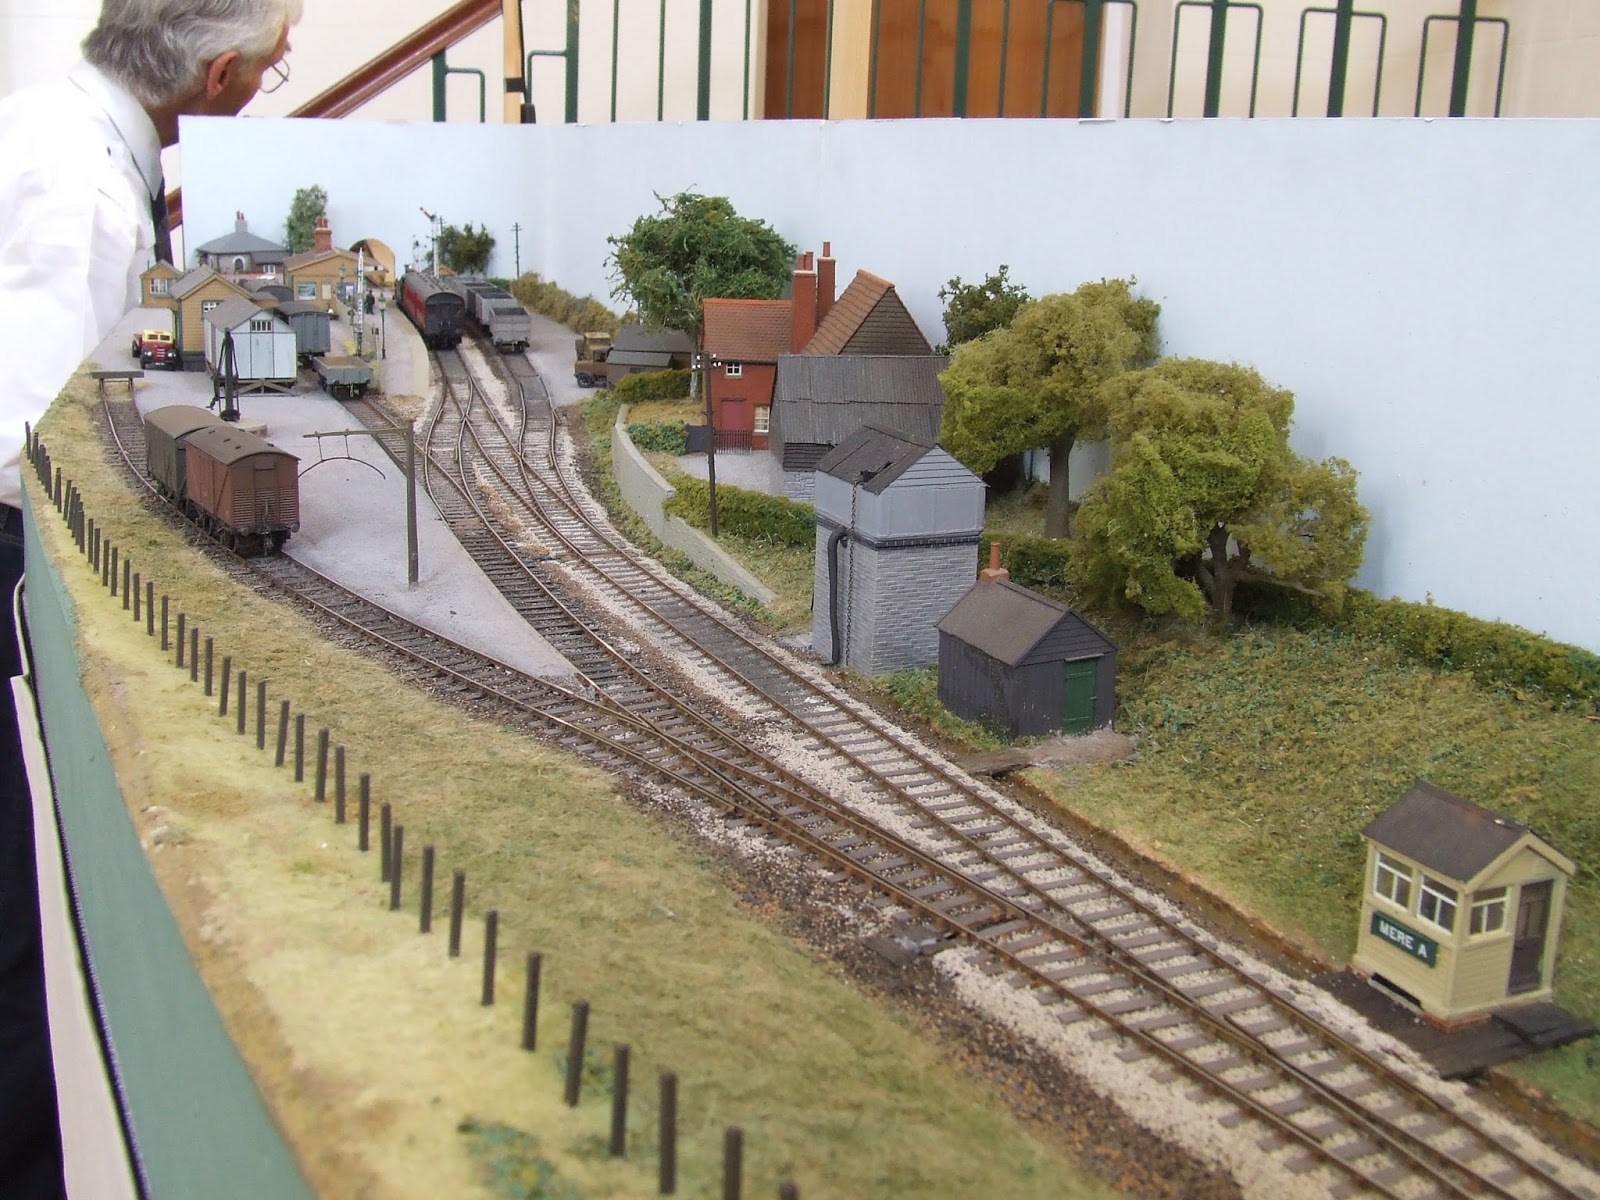
New Mere is fictional layout sited a what might have been Wincanton-Warminster branch of the S.& D.J.R...

New Mere station S.& D.J.R. (P4)

 
Overal view of New Mere S.& D.J.R. (P4)
A nice depiction of Ivo Peters, wife and Bentley overlooking New Mere station

A slightly smaller layout was Chewton Mendip on a fictional branch line to Priddy.

Chewton Mendip S.& D.J.R. (EM)
I met Gordon (our North Lincs Scalefour group leader) at the show and we had a good chat with Tim Tincknell regarding couplings, the merits of EM and P4 along with the sector plate on his Chewton Mendip layout.

Angelbank was one of a few non S.&D.J.R. layouts. It is an EM gauge layout based in Shopshire around Ludlow and I found it interesting due to the working quarry incline...

Angelbank (EM)
Angelbank (EM)
I also thought the bare trees, closed signal box and slighly delapidated loco shed on Angelbank added a nice rundown atmosphere especially as most of use try to depict the opposite.

There were other fine layouts in 2mm Finescale, P4, EM, OO and O along with good trade support. One new trader that I made a purchase from was Attwood Aggregates from Devon who supply stone ballast for N to O scales. All ballest is sourced from six different West Country quarries, one of which is Meldon Quarry. I thought a bag of very fine roadstone and china clay might come in useful...

Overall an excellent day. After the show my wife and I stayed on in Wells for a couple of days to explore and enjoy this unique city. Next year Railwells 40 is planned to be a very speical show, so I need to have a chat with the boss to see if we can do the same again.

Saturday 13 August 2016

Progress on the Barn

I've been using the following photograph as a colour guide for the stone work on the barn. It was taken a few years ago when I was in Cornwall and shows the wall opposite the cottage next to the old track bed at Helland Bridge.


My interpretation below...


After my attempts at representing weathered wood on wagons, I felt I could attempt the barn doors. A different combination of colours was used than those applied to the wagons. This time I started off with a light grey base coat then built up the colours by dry brushing dark grey, followed by Lifecolor's Dark Shade and a few strokes of Bestial Brown.

There is still the roof to get to grips with, along with a little more weathering and tidying up of the rendered walls. I'd also like to add some moss to the roof but at the moment not sure how best to do this?


Friday 12 August 2016

Weathered wood (Part 3)

With the repainting of the 7 plank progressing more to the warm dark shades of browns, I thought I'd try a different approach with the Bachmann 5 plank wagon. Below is the start of the process...

On this wagon I thougth I'd start with a light base coat so applied Lifecolor's Cool Base. You can see on the right od the wagon the start of dry brushing some light grey over the base coat to try to acheive a sun bleached effect. Unfortunately after further dry brushing of a darker grey, along with good old Bestial Brown from Citadel followed by a few strokes of Lifecolor's Dark Shade the result is again not totally what I'm after.

Further work is required on the internal woodwork of the above Bachmann wagon and I've only worked on one external side. Not sure if I have the courage to apply some light stokes of a silvery grey over the wagons current state but I think that is what it needs...

Below is a further photo of the current state of the revamped 7 plank. I think this one will eventually need more black (coal dust) washed over the sides as I'm not really happy with the way it's turning out.


Both wagons require numbering, then once I've added the brake gear, axles boxes and springs to the 7 plank, some delicate weathering will be applied to the sides and running gear.

Well... I'm still not quite achieving the results I'm after with these wagons but nonetheless I am enjoying the process.

Wednesday 10 August 2016

Weathered Wood (Part 2)

Well the attempt at creating a bare wood effect on the old wagon is going OK but I'm still ending up with warm browns not the more washed-out effect I'm really after.


I'd recently purchased a set of Lifecolor's Weathered Wood acrylic paint. On the face of it this set contains some vibrant colours so I did wonder what all the fuss is about from good reviews. To find out I thought I'd trial the colours on this wagon.

I started off applying the UA714 Warm Base Color with a small brush to try and get an uneven coating. Next using the same technique, the UA715 Warm Light Shade was applied, followed by the UA716 Warm Light Shade 2. All seemed to be going well although the result was too bright for my liking. It was toned down after applying, again with a small brush with thin strokes the UA713 Warm Dark Shade which allowed some of the underneath colours to show through. I then tried to apply highlights using UA718 Cold Light Shade with an almost dry brush. To finish, a very thin coat of black was washed over the wagon to pick out the plank edges. For the moment the Iron Work has only had a coating of Chaos Black. Tomorrow I'll be weathering the iron work, also trying to pick out the bolt heads, and tidy up the plank edges.

Overall the result is not too bad, once finished it might pass muster and appear on Tredethy Wharf. Still room for improvement though especially as it has not given me the effect I'm trying to achieve.

Thursday 4 August 2016

Weathered wood (Part 1)

A few years ago (blimey it was in 2011) I built a 7 plank private open wagon and tried to paint it to represent bare weathered wood. Though I liked the outcome at the time, on reflection, I feel I'm a little off the mark...I now think my attempt was a tad too yellow. It needs to be a little more silvery-grey with subtle light grey-brown tones along with hints of yellowy warmth. With the doors on the barn for Tredethy Wharf requiring similar effects, I though I'd return to some wagons to trial weathered wood painting techniques

I'm going to use the following three articles off the web along with Craig Welsh's article in MRJ 200 as examples.
http://www.pacificcoastairlinerr.com/weathered_wood/
(If you explore the last link you should find some nice techniques for wooden effects when startng out with a blank piece of white plasticard).

So, to start this little project off, I dug out a very old, part built, wagon which, I believe, is an Ian Kirk kit.

On the left: 7 plank built in 2011: On the right: old 7 plank kit to be used as a test
In the picture above is the aforementioned 7 plank wagon on the left, on the right is the very old kit with a poor attempt at representing bare wood. We all must have some items that have been put away in disgust at our attempt to create an effective model and this one must have been languishing in a drawer for over 20 years. Behind the two 7 planks is a Bachmann 5 plank wagon that is also up for a bit of a repaint

More to follow...